Hello everyone, today we will learn how to insert data in sql server database using json asp.net web services.
In sql server Database:
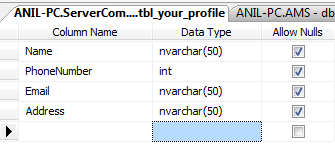
– Create your database
– Create a table with fields “Name, PhoneNumber, Email, Address”
In Visual Studio 2010
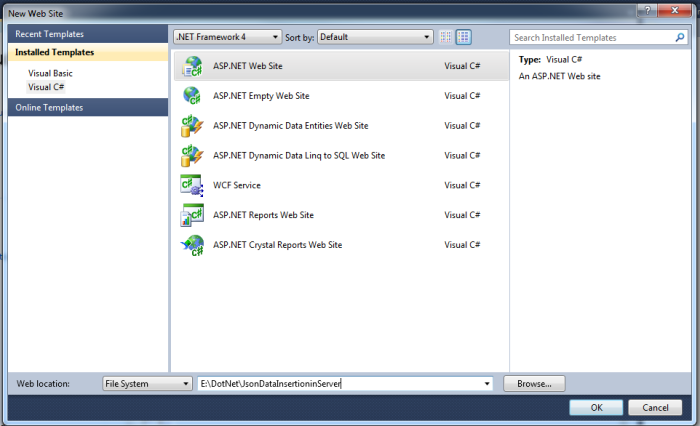
1. Open visual studio.
2. Go to file- new – website
3. Type your project name
Let us first create aspx page which will send our input values to the asmx page. Here we are using jquery -ajax for sending datas to .asmx page which will insert those data to sql database.
1. Now create a new aspx page
- In solution explorer, right click then add new item
- Select Web form
- Enter page name eg:InsertData.aspx

2. Copy the below code in your aspx page.
<html xmlns="http://www.w3.org/1999/xhtml">
<head id="Head1" runat="server">
    <title></title>
    <script type="text/javascript" src="http://code.jquery.com/jquery-1.8.2.js"></script>
    <script type="text/javascript">
        function CallJsonService() {

            // Creating variables to hold data from textboxes
            var name = $('#_txtname').val();
            var phone = $('#_phone').val();
            var email = $('#_email').val();

            var addr = $('#_addr').val();
            alert(name);
            $.ajax({
                type: "POST",
                url: "insertdatajson.asmx/ReceiveWebservice",
                data: "{ 'name': '" + name + "','phone': '" + phone + "', 'email': '" + email + "','address':'" + addr + "'}",
                contentType: "application/json; charset=utf-8",
                dataType: "json",
                async: false,
                success: function (data) {
                    $('#message').text(data.d);
                }
            });
        }
    </script>
</head>
<body>
    <form id="form1" runat="server">
    <div><B> DATA INSERTION  USING JSON ASP.NET WEB SERVICES AND JQUERY</B></div><br /><br />
    <div style="margin:0 auto;width:1000px;">
        Name:
        <asp:TextBox ID="_txtname" runat="server"></asp:TextBox><br /><br />
         Phone:
        <asp:TextBox ID="_phone" runat="server"></asp:TextBox><br /><br />
        Email:
        <asp:TextBox ID="_email" runat="server"></asp:TextBox><br /><br />

        Adrss:
        <asp:TextBox ID="_addr" runat="server"></asp:TextBox><br /><br />
        <input id="_btnSubmit" type="button" value="Submit" onclick="CallJsonService();" />
        <span id="message"></span>
    </div>
    </form>
</body>
</html>
In the above code we are making post ajax call, where type is POST method, and the page to be called is insertdatajson.asmx and the data refers to the data to be passed to asmx page.On successful insertion we get success message.
3. In your web config file , add the connectionstring as :
 <connectionStrings>
    <add name="con" connectionString="server=ANIL-PC;uid=sa;pwd=emizr123;database=ServerCommunication"/>
  </connectionStrings>
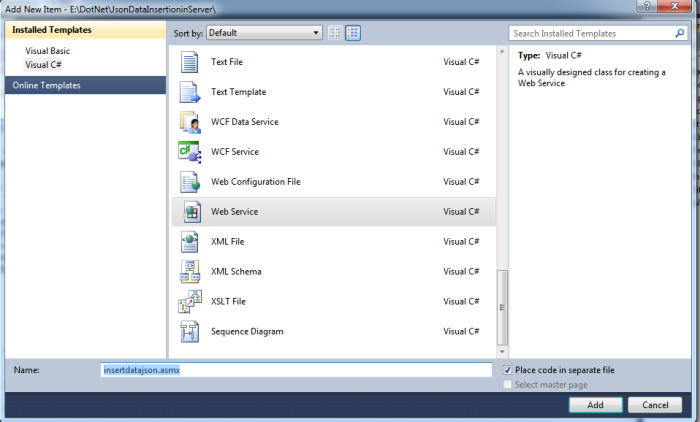
4. Now again in solution explorer, add new item, select web service .
Name it as insertdatajson.asmx
5. In insertdatajson.asmx add the following code.
using System;
using System.Collections;
using System.Collections.Generic;
using System.Web;
using System.Web.Services;
using System.Web.Configuration;
using System.Data;
using System.Data.SqlClient;


/// <summary>
/// Summary description for insertdatajson
/// </summary>
[WebService(Namespace = "http://tempuri.org/")]
[WebServiceBinding(ConformsTo = WsiProfiles.BasicProfile1_1)]
// To allow this Web Service to be called from script, using ASP.NET AJAX, uncomment the following line.
[System.Web.Script.Services.ScriptService]
public class insertdatajson : System.Web.Services.WebService {

    public insertdatajson () {

        //Uncomment the following line if using designed components
        //InitializeComponent();
    }

    // getting connection string
    string conStr = WebConfigurationManager.ConnectionStrings["con"].ConnectionString;
    int rowsInserted = 0;
    [WebMethod]
    public string ReceiveWebservice(string name,string phone ,string email,  string address)
    {
        // Creating Sql Connection
        using (SqlConnection conn = new SqlConnection(conStr))
        {
            // Creating insert statement
            string sql = string.Format(@"INSERT INTO tbl_your_profile ([Name],[PhoneNumber],[Email],[Address])VALUES('{0}','{1}','{2}','{3}')", name,phone, email,  address);
            SqlCommand cmd = new SqlCommand();
            cmd.Connection = conn;
            cmd.CommandText = sql;
            cmd.CommandType = CommandType.Text;
            conn.Open();
            rowsInserted = cmd.ExecuteNonQuery();
            conn.Close();
            cmd = null;

        }

        return string.Format("Congrats, {0} row has been updated", rowsInserted);
    }

}
Note: To allow this Web Service to be called from script, using ASP.NET AJAX,you should uncomment the following line.
[System.Web.Script.Services.ScriptService]
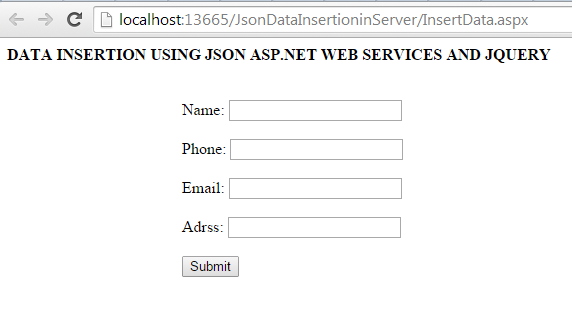
6. Now make your insertdata.aspx as start page. run it , then u get :

7. Fill up the fields and click submit:

8. Now your table will contain the data that you entered.

9. You can even make insertdatajson.asmx as start page, then you can directly fill the data from it.

on clicking ReceiveWebservice, you get screen like:

After you click invoke option, data gets inserted into the database.

Now your table appears as:

You can call above asp web service from any other platforms like iphone, android.
Download above sample application Here